$50 Find, Priceless Result: Restoring a Vintage Wood Vanity
Why Old Furniture Is Worth Saving
Giving worn-out furniture a second chance can completely transform a home. Many pieces may look beyond repair at first glance—peeling finish, mismatched color, damaged surfaces—but with the right approach, they can become standout items again.
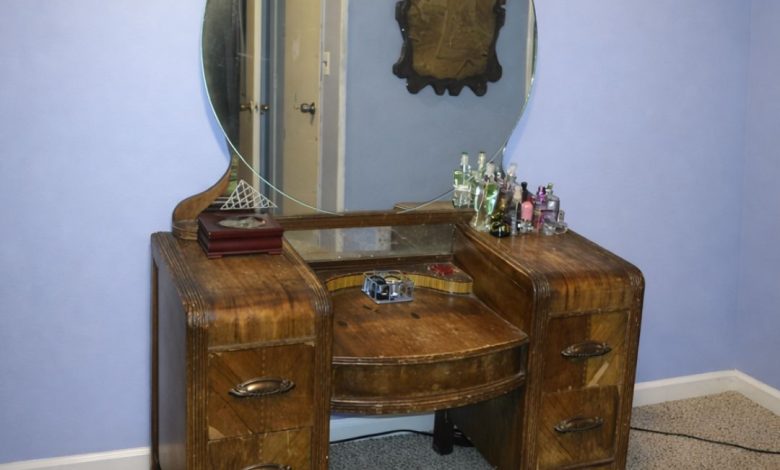
In one inspiring makeover, a DIY restorer purchased a wood vanity from 1942 for just $50. Even though it was in rough shape and clearly needed major work, it still had strong bones and real potential.
The Project Goal: Restore, Not Replace
Rather than covering up flaws quickly, the objective was to bring the vanity back in a way that respected its original character—keeping the shape, preserving the vintage look, and making the wood shine again.
Step-by-Step: How the Vanity Was Restored
1/ Removing the Thick Veneer (The Hardest Part)

- The vanity had an extremely thick veneer that needed to come off before any real restoration could begin.
- Tools that helped get the job done:
- Straight-edge razor
- Putty knives
- Straight-edge razor
- This stage required patience because the veneer was stubborn and time-consuming to lift cleanly.
2/ Sanding the Wood Until Smooth

- After the veneer was removed, the surface needed to be evened out and refined.
- A sander was used to smooth out the wood and erase the roughness left behind.
- Challenges during sanding included:
- Rounded sections
- Detailed decorative wood pieces
- Rounded sections
- Even though it took a long time, the smoother finish created the perfect base for staining.
3/ The Transformation Stage: Staining

- Once the wood was properly prepped, it was time for the most rewarding part: stain.
- The vanity received four coats of stain to deepen the color and bring out the natural wood beauty.
- Multiple coats helped achieve a finish that looked rich, even, and intentional, rather than patchy or rushed.
4/ Restoring the Original Hardware

- Instead of swapping out handles and knobs, the original hardware was refreshed.
- A brass polisher was used to restore the vintage shine, adding the perfect finishing touch.
The Result: A True Before-and-After Glow-Up
After veneer removal, careful sanding, multiple stain coats, and polished hardware, the once-damaged vanity was brought back to life. The final result looked dramatically different—cleaner, brighter, and much closer to what it likely looked like decades ago.

Key Takeaways for Your Next Furniture Restoration
- Look past surface damage—many worn pieces still have excellent structure.
- Prep work matters most: veneer removal and sanding often take longer than painting or staining.
- Multiple stain coats can make a major difference in depth and uniformity.
- Original hardware can often be restored and may elevate the final look more than brand-new replacements.
h/t Hometalk/Molly AuBuchon – incredible work!