Found in my great aunt’s kitchen after she passed.
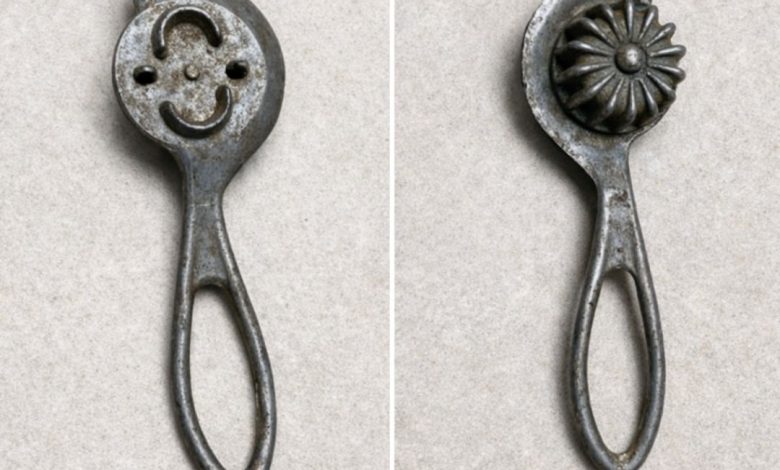
The object in the photo appears to be a handheld pie crust crimper, sometimes also called a fluted pastry wheel. Its distinctive feature is the ridged (fluted) rotating wheel set into a curved metal head, paired with a looped handle for grip and control. Tools like this were designed to give baked goods a clean cut and decorative edge in one quick motion.
What It’s Likely Used For
This tool is commonly associated with baking and dough work, especially for creating a scalloped or fluted pattern. Typical uses include:
- Crimping and decorating pie crust edges (for a finished, bakery-style look)
- Trimming excess dough along the rim of a pie plate
- Cutting pastry strips for lattice tops with a decorative edge
- Shaping dough for turnovers (hand pies, empanadas-style pastries)
- In some kitchens, it may also be used for pasta or filled dough edges (ravioli, pierogi), depending on sharpness and wheel design
Key Design Features (What You’re Seeing in the Photo)
- Fluted wheel: Creates a wavy, decorative imprint as it rolls
- Crescent-shaped guard/head: Helps guide the wheel and maintain a consistent path
- Metal construction: Often made to be durable and long-lasting, especially in older/vintage kitchen tools
- Open loop handle: Designed for stable grip, even with flour-dusted hands
Pie Crust Crimper or Something Else? How to Tell
Many pastry wheels look similar, so identification often comes down to details:
- Wheel edge
- If it feels more rounded than sharp, it’s more likely intended for decorative crimping or gentle trimming.
- If it feels knife-sharp, it may be closer to a pastry cutter used for clean slicing.
- Wheel thickness and spacing
- A thicker, sturdier wheel often points to pie/pastry work.
- Some ravioli wheels are designed to press and seal edges more aggressively, sometimes with a slightly different wheel profile.
- How it performs on dough
- On soft dough, a crimper should roll smoothly and leave a distinct scallop pattern.
- If it primarily slices cleanly without much pattern, it behaves more like a cutter.
How to Use It on a Pie (Simple Steps)
- Prepare the crust edge
- Leave a small overhang of dough and fold it under to create a thicker rim.
- Flour the wheel lightly
- This helps prevent sticking and keeps the pattern crisp.
- Roll along the rim
- Apply steady, gentle pressure and roll the wheel around the edge.
- Touch up if needed
- If dough is too soft, chill the pie briefly, then try again for a sharper imprint.

Pro Tips for Best Results
- Chill the dough for 10–15 minutes before crimping to keep edges neat.
- Use light pressure; pressing too hard can drag dough and blur the pattern.
- If dough sticks, dust with a small amount of flour (avoid over-flouring, which can dry the edge).
- For lattice strips, use a ruler or guide so the fluted cuts look uniform.
Care and Cleaning (Especially for Vintage Metal Tools)
- Wash by hand with warm water and mild soap; dry immediately to prevent corrosion.
- Avoid long soaking if the metal shows age or patina.
- If there is surface discoloration, a gentle scrub with baking soda paste can help—test lightly first.
- Store in a dry place; a thin wipe of food-safe mineral oil can help protect older metal.
Why This Tool Still Matters
Even with modern baking gadgets, a pie crust crimper remains popular because it delivers two things home bakers want: speed and presentation. With one pass, you get a clean finish and a classic decorative edge that makes pies look professionally made.
Conclusion
Based on its fluted wheel and curved head, the tool in the image is very consistent with a pie crust crimper / fluted pastry wheel. Whether used strictly for pies or also for other dough projects, it’s a practical, old-school kitchen tool built to create neat, decorative edges with minimal effort.